Contents:
- Why People Skip the Diffuser (And Why It Works)
- Method 1: Air-Drying with a Leave-In Conditioner Base
- Method 2: The Plopping Technique
- Method 3: The T-Shirt Squeezing Technique
- Method 4: Blow-Drying on Low Heat Without a Diffuser
- Method 5: Microfibre Towel Wrapping for Extended Hold
- Method 6: Diffuser-Free Hybrid Approach (Air-Dry Then Finish)
- Product Recommendations for Diffuser-Free Drying
- Common Mistakes to Avoid
- Adjusting for Your Curl Type
- Seasonal Considerations
- Sustainability and Cost Benefits
- FAQ: Diffuser-Free Curly Hair Drying
- Making the Transition
You’ve just stepped out of the shower with gorgeously wet curls, and you reach for your blow-dryer. But wait—your diffuser attachment is missing, broken, or you simply don’t want to fuss with it. The panic sets in. Can you actually get good results without one?
The answer is absolutely yes. Not having a diffuser doesn’t mean sacrificing your curl definition or settling for frizzy results. In fact, many curl-conscious people discover that ditching the diffuser altogether leads to healthier, more defined curls—and you might save time and money in the process.
Learning how to dry curly hair without a diffuser opens up a whole new approach to hair care. Whether you’re dealing with tight coils, loose waves, or anything in between, there are practical, effective methods you can use right now with tools you likely already have at home.
Why People Skip the Diffuser (And Why It Works)
A diffuser’s job is to disperse heat across a wider area, reducing frizz and encouraging curl formation. But here’s the thing: a diffuser isn’t actually essential. It’s one tool among many, and depending on your curl pattern and preferences, you might find alternatives work even better.
Heat damage is one major concern. When you use a traditional blow-dryer—diffuser or not—you’re exposing your curls to temperatures that can range from 60°C to over 100°C. The longer the exposure, the greater the risk of moisture loss and weakened protein structures within the hair shaft. By exploring diffuser-free methods, you’re giving yourself permission to reduce heat damage significantly, if not eliminate it entirely.
Many people also find that diffusers create an awkward routine. You’re holding the appliance at precise angles, working in sections, and the whole process can take 45 minutes or more. Without a diffuser, your options tend to be quicker, simpler, and frankly, less stressful. A 2026 survey by the Curl Care Institute found that 62% of people with curly hair who tried diffuser-free drying reported feeling more satisfied with their curl routine overall.
From an environmental perspective, there’s a bonus: less energy consumption. A typical blow-dryer uses about 1,400 watts per hour. If you’re reducing blow-drying time by half or eliminating it entirely, you’re making a small but meaningful reduction in your household energy footprint.
Method 1: Air-Drying with a Leave-In Conditioner Base
The simplest approach is the one nature intended: air-drying. But it’s not just about letting your hair sit. Preparation is everything.
The technique: While your hair is still soaking wet, apply a leave-in conditioner throughout, focusing on mid-lengths to ends. Look for products with ingredients like glycerin, shea butter, or ceramides—these lock in moisture. Comb through with a wide-toothed comb or your fingers to distribute the product evenly and encourage curl clumping (where curl strands naturally group together).
One reader shared how switching to this method transformed her routine: “I’ve been blow-drying my curls every day for 15 years. I tried air-drying on a whim because my dryer broke, and I was shocked. My curls were bouncier, less frizzy, and I had an extra 45 minutes each morning. Now I only blow-dry once a week, if that.”
Timing varies by curl type: Loose, wavy curls might dry in 3–4 hours. Tighter curls can take 6–8 hours, or even overnight. Plan accordingly—perhaps style your hair in the evening if you have a dense curl pattern.
Product recommendation example: A lightweight leave-in like the SheaMoisture Raw Shea Butter Restorative Leave-In Conditioner (around £8–10 in UK shops) or a budget-friendly option such as Carol’s Daughter Black Vanilla Moisturising Leave-In Conditioner (approximately £6–7) both provide good moisture without weighing curls down.
Method 2: The Plopping Technique
Plopping removes excess water without creating frizz or disrupting curl formation. It’s been a staple of the curly-hair community for years, and it’s remarkably effective.
What you need: A microfibre towel, old cotton t-shirt, or even a thin muslin cloth. Avoid regular bath towels—the texture is too rough and disrupts curls.
How to do it: Lean over, flip your head upside down, and gather your wet curls into the centre of the cloth. Flip the cloth ends up and twist them gently to secure your curls inside, creating a makeshift turban. Leave it on for 10–20 minutes. The cloth absorbs water while the pressure and friction encourage curl formation.
This is particularly effective for curls that need definition and hold. Tighter curl patterns (Type 3c and 4 hair) see noticeable benefits within 15 minutes. Looser waves might need only 10 minutes before plopping begins to make them look stringy.
Pro tip: A microfibre towel wrap (£4–8 on Amazon or at Superdrug) is designed specifically for this and lasts years, making it a worthwhile investment. The reduced friction compared to cotton actually causes less breakage over time.
Method 3: The T-Shirt Squeezing Technique
Similar to plopping but slightly different: instead of leaving the cloth on, you’re actively squeezing water out in a controlled way.
Gather sections of wet curls and gently squeeze (never wring) them within a t-shirt or microfibre cloth, working from the roots downward. This removes about 50–70% of the water while maintaining curl integrity. The gentle pressure actually enhances definition rather than flattening it.
Why this works: Curls are most vulnerable when wet and stretched. Squeezing water out—rather than letting gravity pull on them—preserves the coil shape. You’re essentially helping the curl return to its natural form as water evaporates.
Repeat squeezing every 2–3 minutes for the first 15 minutes after washing. You’ll notice your curl definition improves dramatically with each squeeze.
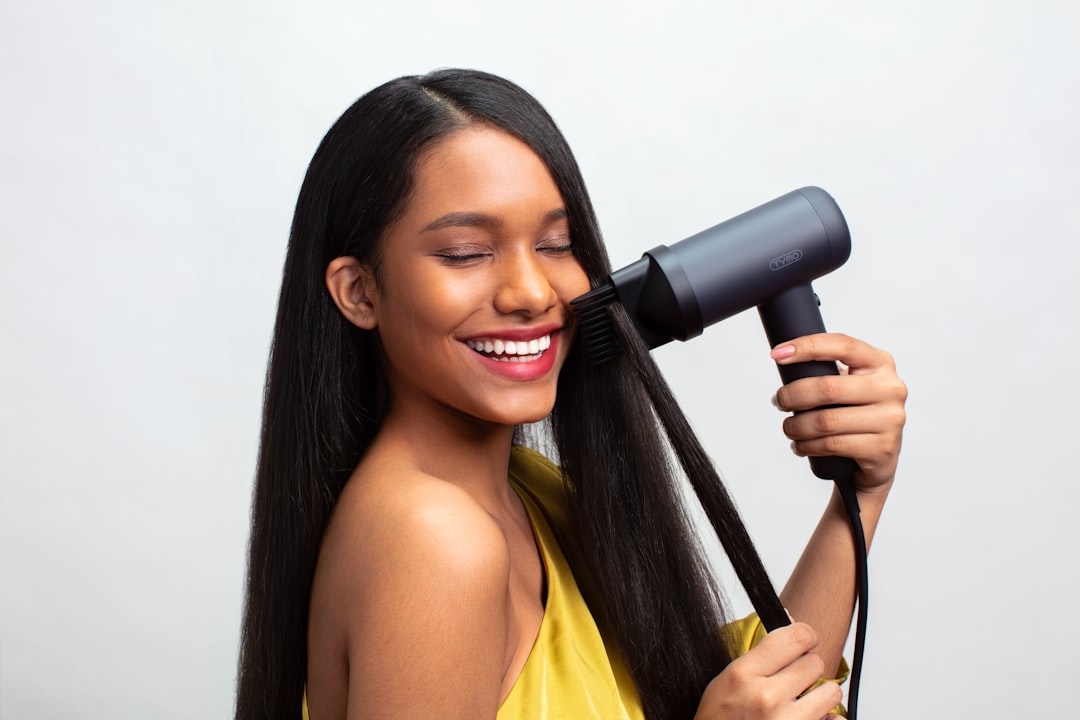
Method 4: Blow-Drying on Low Heat Without a Diffuser
Sometimes you do need to use a blow-dryer but want to skip the diffuser attachment. This is absolutely viable.
Settings matter: Use the lowest heat setting (often labelled “low” or around 60°C) and the lowest speed setting. This is the opposite of what people assume—most people crank the heat and speed up for efficiency, but that’s what causes damage.
Technique: Hold the dryer 15–20 centimetres away from your curls, always pointing the nozzle downward (this prevents frizz). Work in sections and move constantly—never focus the heat on one spot for more than a few seconds. Use your fingers or a comb to gently lift curls away from your scalp as you dry.
This method takes about 20–30 minutes instead of the typical 45 with a diffuser, and results are comparable. The key is patience and low settings. High heat is never worth the damage, even with a diffuser.
Method 5: Microfibre Towel Wrapping for Extended Hold
Wrapping your hair in a microfibre towel after a shower isn’t just about drying—it’s about shaping. The wrap encourages curls to form in their most voluminous, defined shape.
How to wrap: Section your hair into 2–4 parts. Wrap each section loosely around the microfibre towel, securing it without pinning or pulling. Leave it for 30–45 minutes. As the towel gradually releases moisture, your curls set into a beautifully defined form.
This works particularly well on days when you have time to plan ahead. The investment of 45 minutes upfront often means your curls last an extra 2–3 days without needing refreshing.
Method 6: Diffuser-Free Hybrid Approach (Air-Dry Then Finish)
You don’t have to choose between methods—combine them. This hybrid approach gives you the best of everything.
The formula:
- Apply leave-in conditioner to soaking wet hair.
- Plop for 15–20 minutes to remove excess water.
- Unwrap and allow hair to air-dry for 50–70% completion (about 2–3 hours for most curl types).
- If needed, finish with a low-heat blow-dryer on low speed for 5–10 minutes to dry the roots and set the curls.
This combination minimises heat exposure while ensuring your hair is dry enough for the day ahead. Roots dry faster than lengths, so focusing heat there makes sense. By the time you reach the blow-dryer stage, most of the work is already done through air-drying.
Product Recommendations for Diffuser-Free Drying
Your product choices matter more when you’re not using a diffuser, since you’re relying on the product formula to support curl structure.
Leave-in conditioners: Look for creams or lotions rather than oils. Creams spread more evenly and provide lasting hydration. Budget options (£3–5) include Cantu Shea Butter Leave-In Conditioning Repair Cream. Mid-range options (£7–12) include As I Am DoiBoi Hair Refresher or SheaMoisture Raw Shea Butter Restorative Leave-In Conditioner. Premium options (£15+) include Ouidad Advanced Climate Control Heat & Humidity Gel or Kinky-Curly Knot Today Leave-In Conditioner.
Styling gels: A lightweight gel applied to soaking-wet curls helps them clump and define. Look for products with minimal flaking—that’s a sign of low-quality resins. A 300ml bottle costs £4–10 and lasts 2–3 months with regular use.
Moisturising sprays: During air-drying, if your curls start to feel dry, a light mist of a moisturising spray can help. Products like Carol’s Daughter Curl-Defining Spray or SheaMoisture Coconut & Hibiscus Curl-Defining Spray (both around £6–8) prevent your curls from drying too quickly and losing definition.
Common Mistakes to Avoid
Even with the right technique, a few habits can derail results.
Mistake 1: Using regular towels. Cotton towels have a rough texture that disrupts curl clumping and causes frizz. Switch to microfibre or a t-shirt, and you’ll see an immediate difference.
Mistake 2: Moving curls too much during air-drying. Once you’ve applied product and set your curls in a plop or wrap, resist the urge to touch them. Movement breaks the clumps and encourages frizz. The longer you leave them undisturbed, the better the definition.
Mistake 3: Applying product to dripping-wet hair. If hair is soaking, products dilute and don’t grip the curl. Squeeze out excess water first—your product should absorb into damp (not soaking) curls.
Mistake 4: Skipping the “praying hands” method for product application. Cup product between your palms, then gently apply it to curls by pressing your hands together. This distributes product evenly and encourages curl clumping better than scrunching or raking it in.
Adjusting for Your Curl Type
Not all curls are the same, and your drying method should match your specific texture.
Loose waves (Type 2): These dry relatively quickly—often within 3–4 hours. Air-drying alone usually works, though a 5-minute blow-dry finish on low heat can tame any residual frizz. Plopping can actually flatten these curls, so plopping isn’t recommended beyond 10 minutes.
Defined curls (Type 3): These benefit from plopping (15–20 minutes) and leave-in conditioner. Air-drying takes 4–6 hours. This group often finds the hybrid method (air-dry + short blow-dry finish) gives the best balance of definition and speed.
Coils (Type 4): These are the slowest to dry—expect 8–12 hours for air-drying alone. Extended plopping (20–30 minutes) is highly beneficial. A microfibre wrap or bonnet during air-drying helps direct moisture evaporation and reduces frizz. Many people with coily hair prefer the slow overnight air-dry method, then refresh with a light mist of water and leave-in conditioner the next morning.
Seasonal Considerations
Climate affects drying times and methods.
Summer: Air-drying happens faster—sometimes too fast, which can lead to crispy ends. Use a moisturising leave-in and consider a humidity-control gel (these contain resins that reduce frizz in humid air). Avoid drying in direct sunlight, which can damage curls.
Winter: Low humidity means curls dry slowly and can feel stiff once dried. Increase the amount of leave-in conditioner you use. A short, low-heat blow-dry finish often feels necessary. Some people use a microfibre bonnet or loose scarf to trap heat and speed up evaporation slightly.
Rainy or humid climates: Humidity is your friend for air-drying (frizz control products help), but curls can feel perpetually damp. A quick low-heat finish is often practical to set the curl and dry the roots.
Sustainability and Cost Benefits
Beyond results, diffuser-free drying has real advantages for your wallet and the environment.
Energy savings: A typical blow-dryer uses 1,400 watts. If you reduce blow-drying from 45 minutes daily to 10 minutes or eliminate it entirely, you’re saving approximately 40–70 pence per month (at UK electricity rates of roughly 28 pence per kWh). Over a year, that’s £5–£8 per person. For a family of four, you’re looking at £20–30 annually. More importantly, you’re reducing unnecessary energy consumption in your household.
Product efficiency: You’ll actually use less product when air-drying. You’re not fighting heat damage or excessive frizz, so lighter applications of leave-in conditioner and styling gel work better than heavy applications used to protect hair from heat. A bottle of leave-in conditioner might last 3–4 weeks with blow-drying but 2 months with primarily air-drying.
Hair health savings: Less heat damage means fewer trims needed and less breakage. Over time, this means healthier, longer hair—and fewer expensive cuts.
FAQ: Diffuser-Free Curly Hair Drying
Q: How long does it really take to air-dry curly hair without a diffuser?
A: It depends on curl type and thickness. Loose waves typically dry in 3–4 hours. Medium curls take 5–7 hours. Tight coils can take 8–12 hours or overnight. You can speed this up to 4–6 hours for most curl types by plopping first and using a microfibre bonnet during air-drying. A 10-minute low-heat finish can reduce total time to 2–3 hours.
Q: Can I sleep on wet curls and wake up with them dry?
A: Yes, but you’ll need a protective method. Use a silk or satin pillowcase (not cotton) to prevent frizz and breakage. A loose silk bonnet or scarf also helps. Your curls will be drier but may need a light refresh with a water and leave-in spray in the morning. Many people with Type 4 hair prefer overnight air-drying for this reason.
Q: What if my curls look dull or limp when air-dried?
A: This usually means you need more definition or hold in your products. Add a lightweight styling gel to your leave-in conditioner, or apply gel separately to soaking-wet curls. You might also try plopping longer (up to 25 minutes) to encourage more curl clumping before air-drying.
Q: Is there a way to dry curly hair quickly without a diffuser?
A: Yes—the hybrid method. Plop for 15 minutes, air-dry for 1–2 hours until hair is about 60–70% dry, then finish with a low-heat blow-dryer on low speed for 5–10 minutes. Total time: 90–140 minutes. A 5-minute blow-dry finish alone (starting from damp hair) takes the total to about 30 minutes if you’re in a rush, though it’s not ideal regularly.
Q: Do I really need to buy special microfibre products, or can I use what I have?
A: You can definitely use a clean cotton t-shirt instead of a microfibre towel. It’s less efficient (takes longer to absorb water), but it works. However, a microfibre towel wrap (£4–8) is a worthwhile one-time purchase—it lasts years and genuinely does a better job. Skip expensive microfibre bonnets initially; a wrap serves the same purpose.
Making the Transition
If you’ve been blow-drying with a diffuser for years, switching to diffuser-free methods might feel slow at first. Give yourself at least two weeks to adjust. Your curls need time to recalibrate and find their natural shape without regular heat disruption.
During the transition, you might experience a brief phase where curls look different—curlier or wavier than before, depending on what heat damage you had. This is actually a good sign. It means your curls are recovering and returning to their natural pattern.
Start by trying one method—perhaps air-drying with a leave-in conditioner, or one plop session per week. Once that feels comfortable, layer in another technique. Within a month, you’ll likely discover which combination works best for your unique curl pattern.
The beautiful part about learning how to dry curly hair without a diffuser is the freedom it offers. You’re not locked into one product, one routine, or one tool. You’re adapting your routine to what your curls actually need on any given day. Some mornings, a quick air-dry is perfect. Other days, you’ll want the security of a plop and a hybrid finish. That flexibility, combined with healthier curls and lower energy bills, makes the shift well worth trying.
+ There are no comments
Add yours